

Looking for a delicious bisquick waffle recipe that’s quick, easy, and perfect for busy mornings? You’re in the right place! With just a few simple ingredients and about 15 minutes of your time, you can whip up a batch of fluffy, golden waffles that will impress even the pickiest eaters. Whether you’re feeding a hungry family or treating yourself to a weekend indulgence, this recipe is a game-changer. No complicated steps, no fancy equipment—just pure breakfast magic. Let’s dive in!
Table of Contents
What You’ll Need to Get Started
Before we jump into the fun part—actually cooking these bad boys—you gotta make sure you’ve got everything ready. Trust me, nothing ruins the mood faster than realizing halfway through that you’re out of eggs or your waffle iron is still packed away in the garage. Been there, done that! So, here’s what you’ll need.
Ingredients List
Let’s start with the good stuff: the ingredients. It doesn’t get much simpler than this. All you need are four humble items:
- 1 cup Bisquick mix : This is the star of the show. If you don’t have it already, pick up a box—it lasts forever and can save your breakfast game any day of the week.
- 3/4 cup milk : Whole milk works best for richness, but if you’re using almond milk or skim, no worries—it’ll still turn out great. Just keep an eye on consistency later.
- 1 egg : Crack it fresh; stale eggs ain’t gonna cut it. (Yeah, I learned that one the hard way once.)
- 2 tablespoons melted butter : Don’t skip this step! Melted butter adds richness and keeps those waffles moist. Plus, who doesn’t love butter?
Equipment Needed
Now, onto the tools. You don’t need anything fancy here—just basic kitchen gear:
- Mixing bowl : Any size will do as long as it holds all your ingredients comfortably. No need to drag out the stand mixer unless you really want to.
- Whisk or fork : A whisk makes things smoother, but if you’re keeping it low-key, a fork does the trick too.
- Measuring cups and spoons : Precision matters when baking, so grab these babies. eyeballing it might work sometimes, but not always—and trust me, nobody wants flat waffles.
- Waffle iron : Duh, right? Make sure yours is clean and working properly. If it’s been sitting unused for a while, give it a quick test run before diving in.
Pro tip: Preheat your waffle iron while you prep the batter. Saves time and ensures everything runs smoothly. And hey, if your waffle iron has adjustable settings, aim for medium-high heat. Too high, and they burn super fast!
That’s it! Once you’ve rounded up these essentials, you’re ready to rock. Let’s move on to the actual steps—where the magic happens. But first, double-check your list. Nothing worse than stopping mid-batter to run to the store, am I right?
Step-by-Step Guide to Making Bisquick Waffles
Alright, folks, now that you’ve got everything prepped, let’s get down to business. Making Bisquick waffles is about as easy as pie (or maybe even easier). Follow these five simple steps, and you’ll be digging into fluffy, golden goodness in no time.
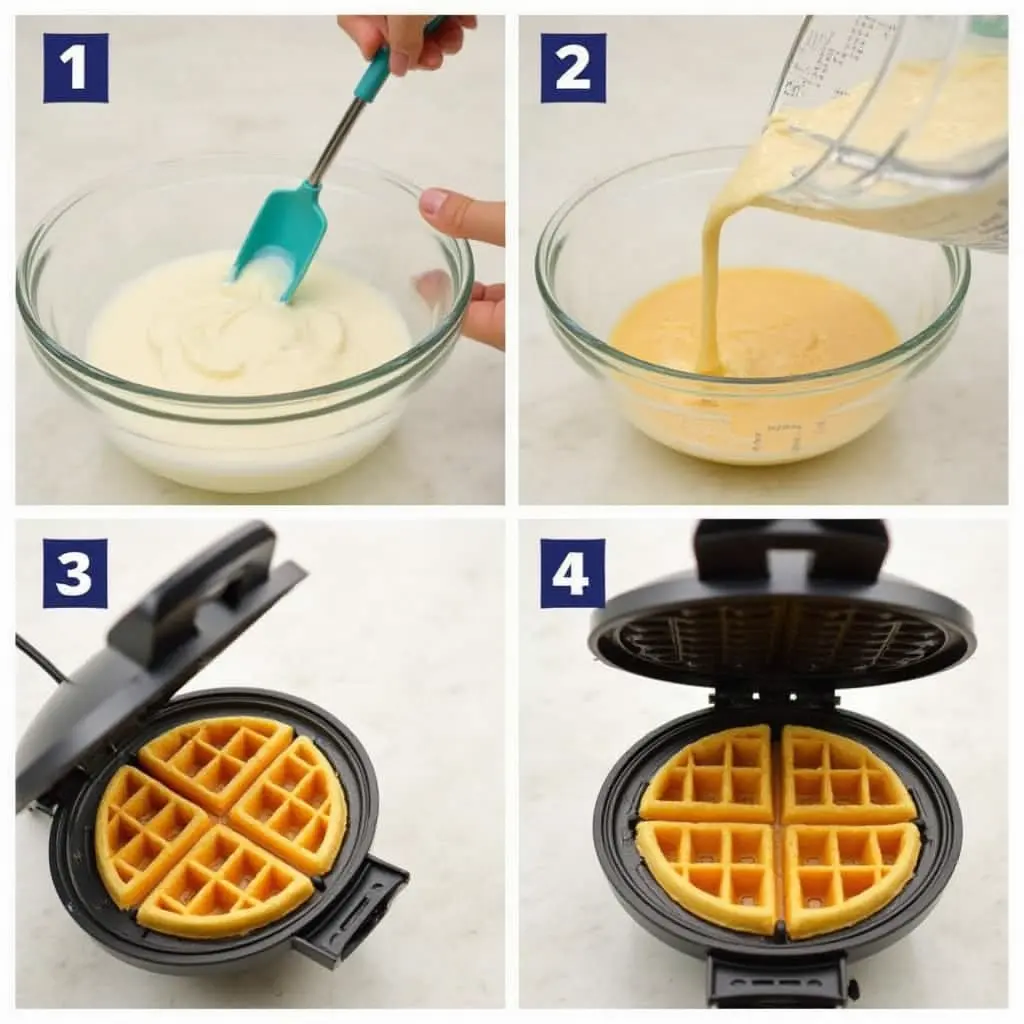
Step 1 – Mix Your Dry Ingredients
Start by dumping that cup of Bisquick mix into your mixing bowl. Yeah, I said dump . No need to be fancy here. Give it a little stir just to break up any clumps—you know, those pesky ones hiding at the bottom of the box. If you skip this step, they might show up later in your batter, and nobody wants lumpy waffles. Trust me on this one!
Step 2 – Add Wet Ingredients
Next, crack your egg into the bowl. Beat it up good with a whisk or fork until it’s all mixed in. Then, pour in the milk and melted butter. Stir everything together until it’s smooth and creamy. Don’t overmix—it’s like beating a dead horse. Overmixing makes the waffles dense, and we want them light and airy, right?
Step 3 – Stir Until Smooth
Give your batter one final stir. See how nice and thick it is? That’s exactly what you’re aiming for. If it seems too thin, add a splash more Bisquick. Too thick? A bit more milk will fix it. It’s all about balance, my friend.
Step 4 – Preheat Your Waffle Iron
While you’re admiring your handiwork, turn on your waffle iron. Most models take a few minutes to heat up, so use this time wisely. Maybe grab a glass of juice or prep your toppings. Oh, and don’t forget to lightly grease the iron if it’s not non-stick. Nobody likes sticking waffles.
Step 5 – Cook Your Waffles
Scoop about ½ cup of batter onto the hot iron—any more, and it’ll overflow like a volcano. Close the lid and wait patiently. Resist the urge to peek! When the waffle turns golden brown and crispy, voilà! You’ve got yourself a masterpiece.
See? Told ya it was easy. Now go ahead and repeat until you’ve used up all the batter. And remember, practice makes perfect. My first batch ever came out a little burnt, but hey, I learned from it. Happy cooking!
Tips for Mastering Your Bisquick Waffle Recipe
Alright, so you’ve got the basics down, but let’s face it—there’s always room to level up your waffle game. Over the years, I’ve made more Bisquick waffles than I can count, and trust me, I’ve messed up plenty of times. But hey, every mistake is a learning opportunity, right? Here are some pro tips to help you avoid my blunders and make perfect waffles every single time.

Adjust Liquid for Desired Texture
One of the biggest things I’ve learned is that consistency matters. If your batter feels too thick, add a splash of milk—one tablespoon at a time—to thin it out. On the flip side, if it’s runny, sprinkle in a bit more Bisquick mix. Honestly, I once ended up with pancake-like waffles because I went overboard with the milk. Not ideal, but still edible!
Experiment with Add-Ins
Why stick to plain old waffles when you can jazz them up? Throw in some chocolate chips for a sweet twist, or toss in fresh blueberries for a fruity kick. Cinnamon is another game-changer—it adds just enough warmth without overpowering the flavor. My go-to combo? Chocolate chips and cinnamon. Yeah, I said it.
Keep Them Warm
Here’s a tip I wish someone had told me sooner: if you’re making multiple batches, keep the cooked waffles warm in a low oven (around 200°F). Just place them on a wire rack to prevent sogginess. Nothing ruins a waffle faster than letting it sit on a plate and get cold and mushy. Been there, done that—and it ain’t pretty.
Don’t Rush the Cooking Process
Patience is key, folks. I know it’s tempting to open the waffle iron early to check progress, but resist the urge! Let the waffles cook undisturbed until they’re golden brown and crispy. Prematurely opening the iron can lead to undercooked centers. Learned that one the hard way, lemme tell ya.
With these tips in your back pocket, you’ll be cranking out restaurant-quality waffles like a pro. Happy cooking, and remember—mistakes happen, but they usually taste pretty dang good anyway!
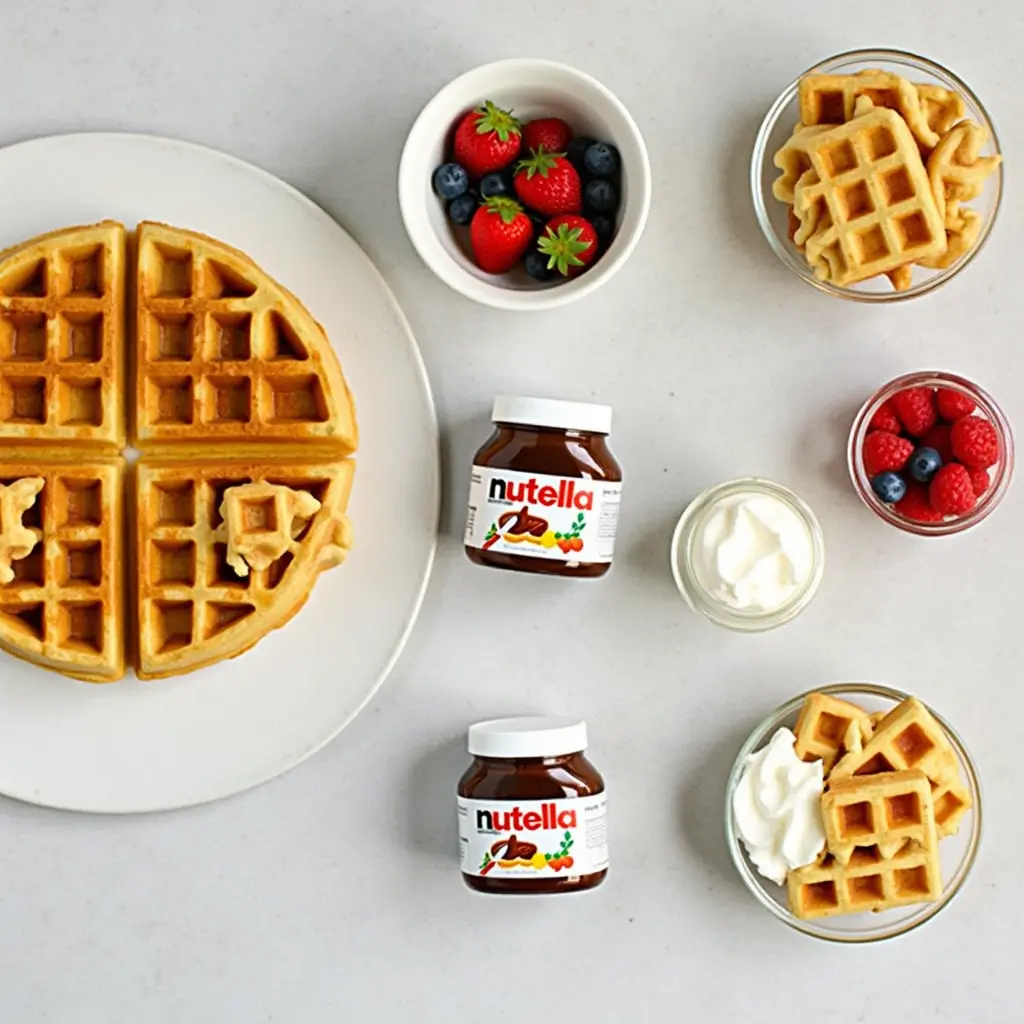
Serving Suggestions and Toppings
Okay, so you’ve nailed the recipe, and your waffles are golden, fluffy, and downright irresistible. But let’s be real—toppings are where the magic happens! After all, who doesn’t love a little extra flair to take their breakfast from “meh” to “wow”? Here are some of my favorite ways to serve up Bisquick waffles that’ll make even the pickiest eaters drool.
Classic Maple Syrup and Butter
Let’s start with the basics because sometimes simple is best. Drizzle high-quality maple syrup over your waffle—it makes all the difference compared to the fake stuff. Then, dot it with softened butter for an extra-rich finish. Mmm, comfort food at its finest. Pro tip: warm the syrup slightly in the microwave for that gooey goodness.
Fresh Fruits and Whipped Cream
If you’re feeling fancy, top your waffles with fresh fruits like sliced strawberries, bananas, or mixed berries. Add a dollop of whipped cream for a light, airy touch. I once threw together a quick fruit salad and piled it onto my waffles—it was like eating dessert for breakfast. No complaints here!
Nutella or Peanut Butter
For something indulgent, spread a layer of Nutella or creamy peanut butter across the waffle. If you’re feeling adventurous, try both! The combination of chocolate and peanut butter is pure heaven. Just don’t go overboard unless you want a heart attack on a plate. Been there, done that—and it was amazing but maybe not the healthiest choice.
Savory Options
Who says waffles have to be sweet? Try topping yours with scrambled eggs, bacon, or avocado for a savory brunch option. Sprinkle a bit of cheese on top for good measure. Trust me, this combo works wonders when you’re craving something different.
Mix It Up!
The beauty of waffles is their versatility. One day you might feel like classic toppings, and the next, you could experiment with honey, yogurt, or even caramel sauce. There’s no wrong way to enjoy them—as long as they’re hot and crispy!
So there you have it, folks. Whether you stick to tradition or get creative, these serving suggestions will help you elevate your Bisquick waffles to new heights. Now go ahead and dig in—you deserve it!
Conclusion
Making Bisquick waffles has never been simpler! By following these five easy steps, you can whip up a batch of fluffy, golden waffles in no time. Customize them with your favorite toppings and enjoy a satisfying meal anytime. So grab your Bisquick mix and start cooking—you won’t regret it! Don’t forget to bookmark this recipe for future reference.
FAQs
1. Can I use gluten-free Bisquick for this recipe?
Yes, you can use gluten-free Bisquick. It works just as well and is perfect for those with dietary restrictions.
2. How long does it take to cook one waffle?
Cooking time varies by waffle iron, but it usually takes 3-5 minutes per waffle.
3. Can I freeze leftover waffles for later?
Absolutely! Allow the waffles to cool down fully before storing them in an airtight container or resealable freezer bag. Reheat in the toaster for crispy results.
4. What type of milk works best in this recipe?
Whole milk gives the richest flavor, but almond, oat, or skim milk works fine too.
5. Is it possible to make mini waffles using this recipe?
Yes, simply use a mini waffle iron. Cook times may be shorter, so keep an eye on them.