

Who doesn’t love the satisfying crunch of perfectly fried squash? Whether you’re a seasoned chef or a beginner cook, mastering this quick 3-step fried squash recipe will elevate any meal! Did you know that squash is not only tasty but also packed with nutrients like vitamin A and fiber? In this article, we’ll walk you through an easy method to prepare crispy, flavorful fried squash right at home. No fancy equipment needed—just some basic ingredients and a little time. Let’s dive in!
Table of Contents
Why Fried Squash Should Be Your Next Side Dish
You know what’s been a total game-changer for me in the kitchen? Fried squash. Yeah, you heard me right—fried squash! I used to think of it as just another veggie that was kinda there, but after giving it a shot, I realized how amazing it can be. So why should you make fried squash your next side dish? Let me explain it to you.
Health Benefits of Squash
First off, let’s talk about the health stuff because, hey, we all want to eat well without sacrificing flavor, right? Here’s the deal:
- Packed with essential vitamins and minerals: Squash is loaded with vitamin A (great for your eyesight) and vitamin C (boosts your immune system).
- Low in calories but high in fiber: This means it keeps you feeling full longer, so no more mid-afternoon snack attacks!
Now, here’s where I messed up once: I tried roasting squash without peeling it first. Big mistake. The skin stayed chewy and gross instead of crispy and delicious. Lesson learned? Prep matters! When you fry squash, though, the outside gets this perfect golden crunch while the inside stays soft and tender. It’s honestly one of those foods that feels indulgent but isn’t actually bad for you.
Versatility in Cooking
But wait, there’s more! One of the coolest things about fried squash is how versatile it is. You can pair it with almost any cuisine. For example:
- Last week, I made a Mexican-inspired meal with tacos, rice, and beans. I threw some fried squash on top, sprinkled it with lime juice and chili powder, and BOOM—it was amazing.
- Another time, I served it alongside grilled chicken and roasted potatoes for a classic American dinner. It fit perfectly!
And let’s not forget the visual appeal. Fried squash adds a pop of color to any plate. Whether you’re hosting a dinner party or just cooking for yourself, it looks fancy enough to impress but is super easy to pull off.
Honestly, I could go on and on about how great fried squash is. But don’t take my word for it—try it out yourself! Trust me, once you taste that crispy exterior and buttery interior, you’ll wonder why you ever skipped over squash before.
Gather Your Ingredients for the Perfect Fried Squash Recipe
Alright, folks, let’s talk ingredients! If you’re thinking about making fried squash at home, the first step is gathering everything you need. Trust me, I’ve been there—standing in the middle of the kitchen, realizing halfway through that I forgot something crucial. Not fun. So, here’s my go-to list to keep things simple and stress-free.
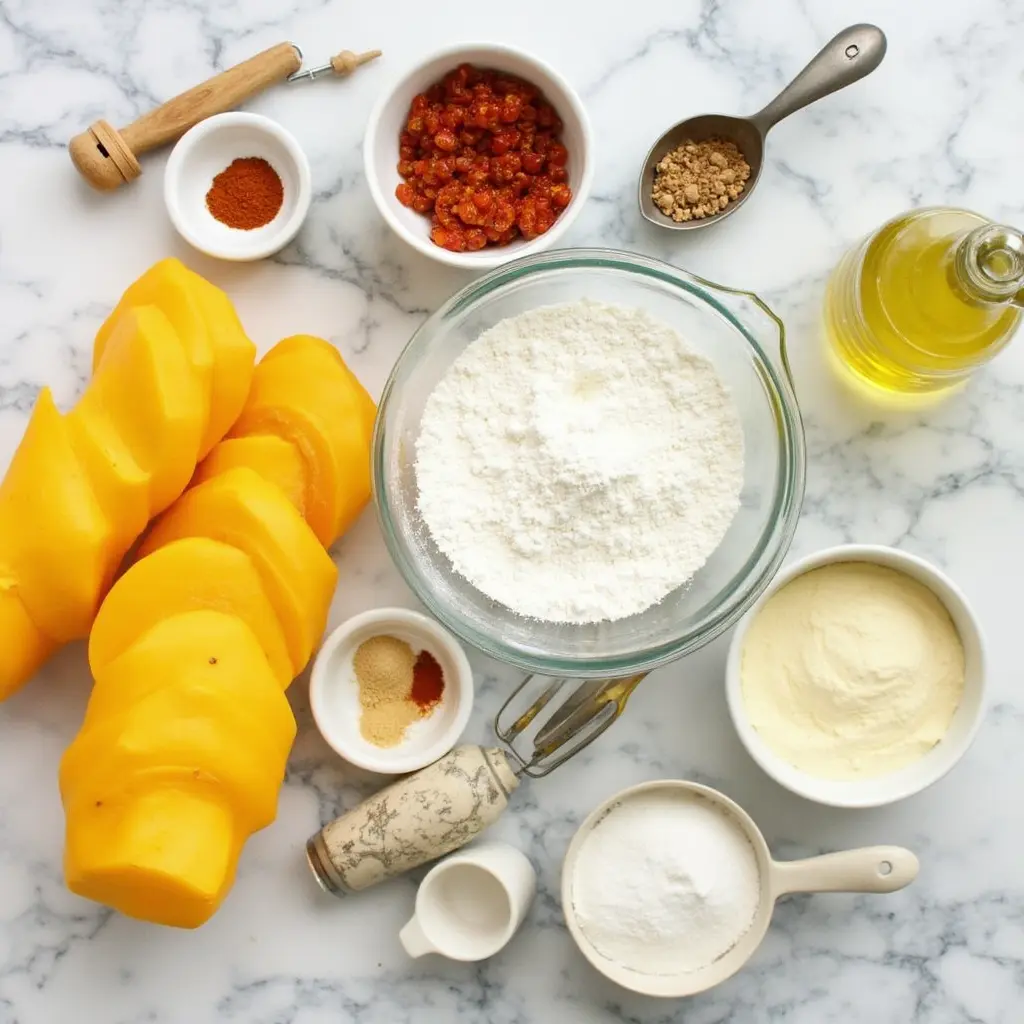
Key Ingredients You’ll Need
First up, the star of the show: fresh summer squash. Now, this might sound obvious, but hear me out. One time, I grabbed zucchini instead of yellow squash because they were on sale. While it still turned out okay, yellow squash has a sweeter flavor that works better for frying. Moral of the story? Pick your produce wisely!
Next, we’ve got our coating game. Here’s what you’ll want:
- All-purpose flour or cornmeal: Cornmeal gives a bit of crunch, while flour makes it lighter. Choose based on your mood!
- Spices like paprika, garlic powder, and cayenne pepper: These add layers of flavor without overpowering the natural sweetness of the squash. A pinch of salt is also a must.
And last but not least, the oil. Use an oil with a high smoke point, like vegetable oil or peanut oil. Canola works too if that’s what you have on hand. Pro tip: Don’t skimp on the oil—it’s key to getting that golden-brown goodness.
Tools Required for Preparation
Now, onto the tools. No fancy gadgets required here, just good ol’ basics:
- Ensure your knife is sharp! Nothing ruins dinner prep faster than a dull blade. Nothing ruins dinner prep faster than struggling to slice through veggies.
- Mixing bowl: For tossing the squash in the seasoning mix. Bonus points if it’s big enough to fit everything comfortably.
- Skillet or frying pan: Cast iron is ideal because it retains heat so well, but any sturdy pan will do.
Here’s a little secret: I once tried to fry squash in a nonstick pan thinking it would be easier to clean later. Bad idea. The coating stuck everywhere, and I spent half the night scrubbing. Lesson learned? Stick with cast iron when possible.
So, there you have it—a quick rundown of everything you need to get started. Once you’ve got these ingredients and tools ready, you’re set to tackle the next steps. And don’t worry if you mess up along the way; even mistakes can teach you something valuable. Happy cooking!
Step-by-Step Guide to Making Crispy Fried Squash
Alright, buckle up because we’re diving into the heart of this recipe: how to make crispy fried squash in just three simple steps. This is where the magic unfolds, and honestly, it’s simpler than you might imagine. I’ve messed it up a few times (who hasn’t?), but now I’ve got it down to a science—or at least something close enough to pass as one!
Step 1 – Prep the Squash
Let’s start with prep work. You’d be surprised how much difference proper preparation makes. Here’s what you need to do:
- Wash and slice the squash: Grab your summer squash and give it a good rinse under cold water. Slice it into even pieces—about ¼ inch thick works best. Consistency is key here; if some slices are thicker than others, they won’t cook evenly.
- Pat dry with paper towels: Moisture is the enemy of crispiness! If you skip this step, your squash will steam instead of fry, leaving you with soggy results. Trust me, I learned the hard way when I tossed wet squash into hot oil. Disaster.
Pro tip: If you have time, let the sliced squash sit on a paper towel-lined plate for 10 minutes before patting them dry again. Extra moisture removal = extra crunch.
Step 2 – Create the Coating Mixture
Now comes the fun part: creating that golden-brown crust. Here’s how:
- Combine flour, spices, and salt in a shallow dish: Use about ½ cup of all-purpose flour or cornmeal, depending on your preference. Add a teaspoon of paprika for smokiness, a dash of garlic powder for depth, and a pinch of cayenne pepper if you like a little heat. Don’t forget the salt—it brings out the natural sweetness of the squash.
- Toss the squash slices to coat evenly: Place the squash in the mixture and gently toss until each piece is fully coated. Shake off any excess so you don’t end up with clumpy breading.
Side note: Sometimes I get lazy and skip the tossing step, thinking I’ll just sprinkle the mix over the squash later. Big mistake. The coating doesn’t stick as well, and you lose that perfect texture. Take the extra minute—it’s worth it!
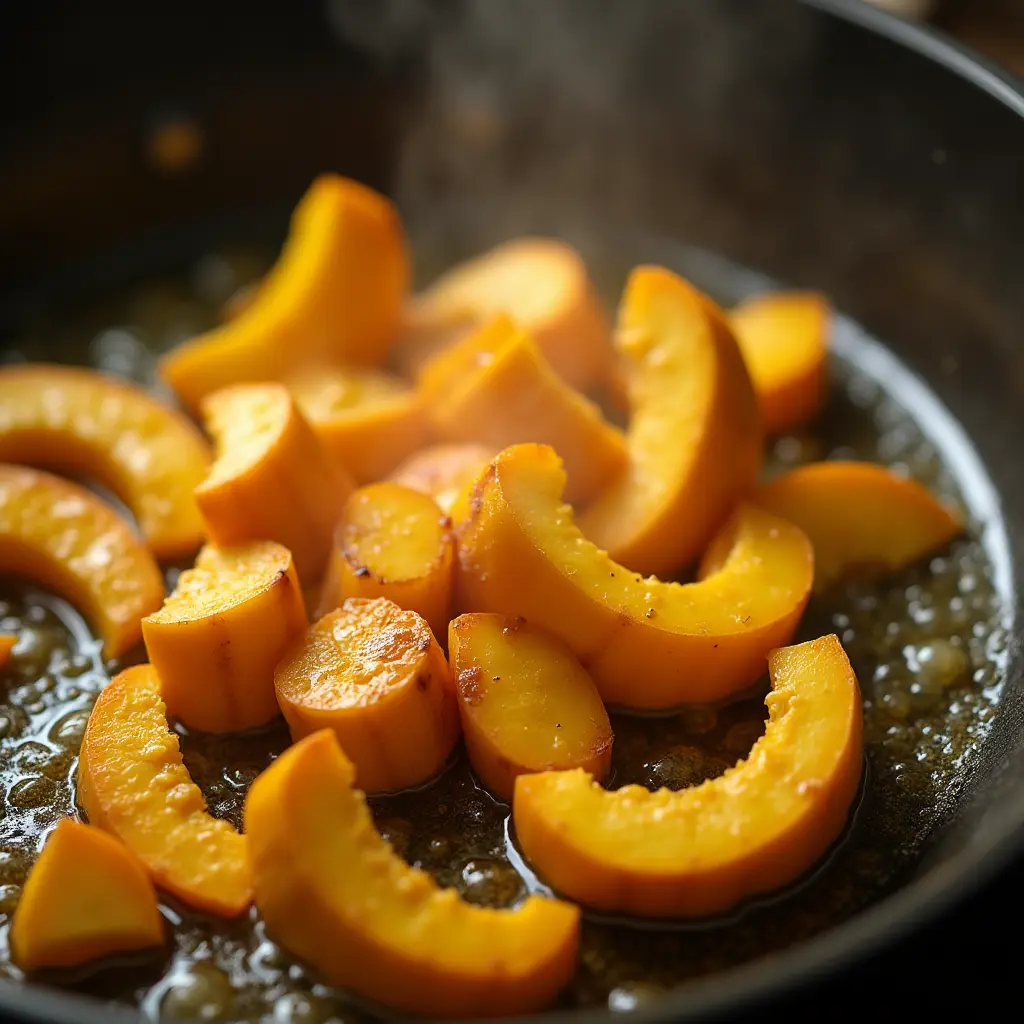
Step 3 – Fry Until Golden Brown
The final step is frying, and honestly, this is where the real satisfaction lies. Watching those pale slices transform into crispy golden goodness never gets old. Follow these tips:
- Heat oil in a skillet over medium heat: Pour in about ½ inch of vegetable oil or peanut oil. Let it heat up for a few minutes until it shimmers. Test the temperature by dropping in a small piece of squash—if it sizzles immediately, you’re ready to go.
- Cook the squash until crispy and tender: Lay the coated squash slices in the pan without overcrowding. Cook for about 3–4 minutes per side, flipping carefully with tongs. Overcrowding lowers the oil temperature, leading to greasy results. Work in batches if necessary.
Once they’re golden brown and perfectly crispy, transfer the squash to a paper towel-lined plate to drain any excess oil. Sprinkle with a bit more salt if desired, and voilà—you’ve got yourself some restaurant-quality fried squash!
See? Not so hard, right? Sure, there might be a learning curve, but once you nail this process, you’ll wonder why you ever bought frozen veggies from the store. Go ahead, give it a shot—I promise you won’t regret it!
Tips for Achieving Restaurant-Quality Results
Alright, you’ve got the basics down, but let’s take your fried squash game to the next level. Here are some insider tips I’ve picked up over the years that’ll make your homemade dish taste like it came straight from a top-notch restaurant. These aren’t just random suggestions—I’ve made plenty of mistakes along the way, so consider this my gift to you!
Choosing the Right Oil
First things first: oil matters. You can’t just grab whatever’s in your pantry and expect stellar results. Use oils with high smoke points, like peanut oil, canola oil, or even vegetable oil. Why? Because low-smoke-point oils break down at higher temperatures, leaving a bitter taste and ruining all your hard work.
One time, I tried frying squash in olive oil because it was “healthier.” Big mistake. It started smoking halfway through, and the entire kitchen smelled like burnt food. Lesson learned: stick with the right oil for frying. Your future self (and your smoke alarm) will thank you.
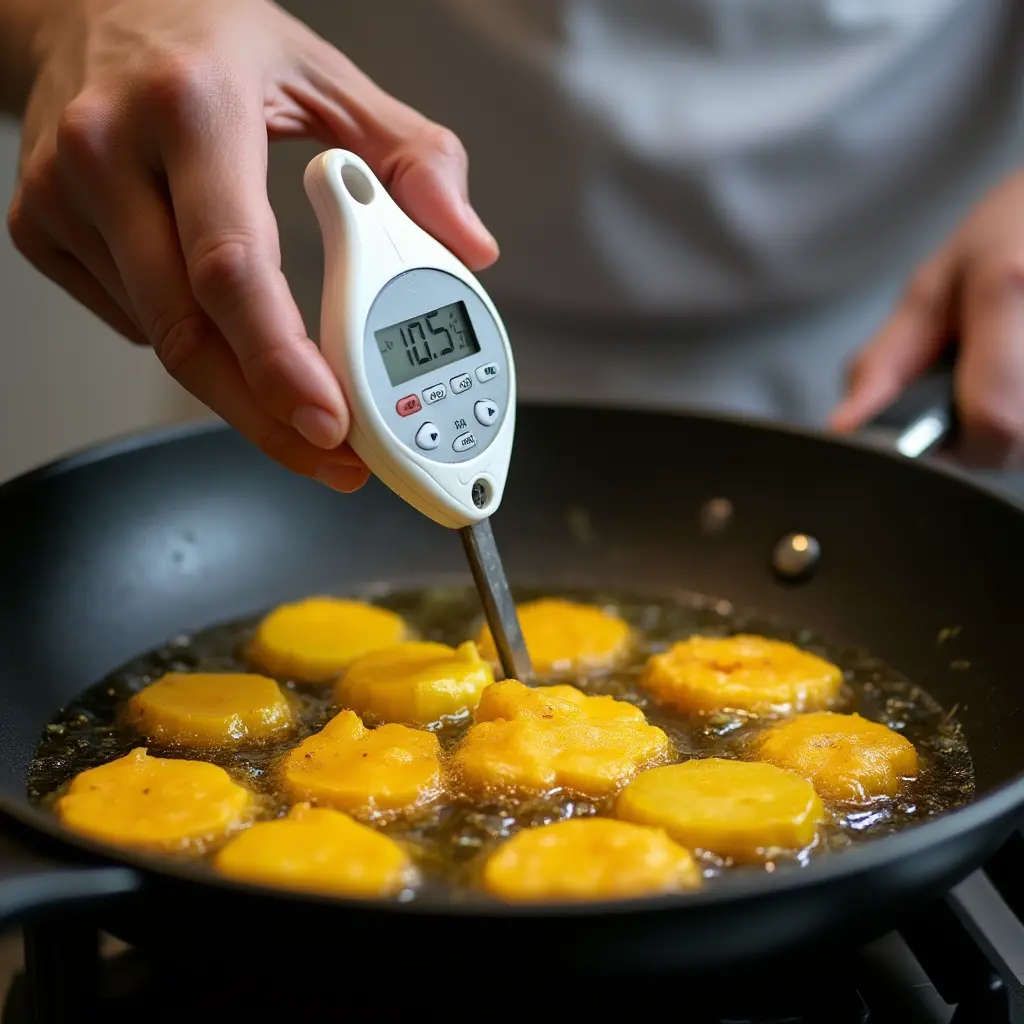
Maintaining Proper Temperature
Another crucial factor is keeping the oil at the right temperature. Aim for 350°F to 375°F. Too low, and your squash will absorb too much oil, becoming greasy. Too high, and it’ll burn on the outside while staying raw on the inside.
Here’s a pro tip: invest in a deep-fry thermometer. It’s cheap, easy to use, and takes all the guesswork out of frying. If you don’t have one, test the oil by dropping in a small piece of squash. If it sizzles gently and floats to the surface, you’re good to go.
Avoid Overcrowding the Pan
This is probably the most common mistake people make when frying anything—not just squash. Overcrowding lowers the oil temperature, which leads to soggy results. Trust me, I’ve done it before. One day, I decided to fry an entire batch of squash at once to save time. What happened? A pile of limp, greasy mess that ended up in the trash.
Instead, fry in smaller batches. Yes, it takes longer, but the payoff is worth it. Plus, flipping becomes easier when there’s space between the pieces. And speaking of flipping…
Flip Like a Pro
Don’t be afraid to turn those slices! Once the bottom side turns golden brown, flip each piece carefully using tongs. Cook for an additional 2–3 minutes on the other side to ensure even browning and prevent burning.
Also, resist the urge to poke or press down on the squash. Doing so forces oil into the food, making it soggy. Let nature do its thing—gravity will help the coating adhere perfectly without interference.
Drain Excess Oil
After frying, transfer the squash to a plate lined with paper towels. This step removes any excess oil clinging to the surface, keeping your dish light and crispy. Some folks skip this part thinking it doesn’t matter, but trust me, it does. Nobody wants oily fingers or soggy squash.
By following these simple yet effective tips, you’ll achieve that perfect balance of crunch and flavor every single time. Sure, practice makes perfect, but these tricks should give you a head start. So grab your skillet, heat up the oil, and get ready to impress everyone with your newfound frying skills!
Conclusion
And there you have it—a quick and easy way to make restaurant-quality fried squash from the comfort of your own kitchen! This 3-step process ensures perfectly crispy results every time. Whether you’re serving it as a side dish or incorporating it into main courses, fried squash adds a delightful crunch and flavor. So grab your apron and give this recipe a try—you won’t regret it! Don’t forget to share your creations with friends and family.
FAQs
1. What type of squash works best for frying?
Summer squash varieties like zucchini and yellow crookneck work exceptionally well due to their thin skin and mild flavor.
2. How do I prevent the oil from splattering during frying?
Ensure the squash is completely dry before adding it to the hot oil. Additionally, avoid overcrowding the pan.
3. Is it possible to bake the squash instead of frying it?
Yes, baking is a healthier alternative. Simply toss the coated squash in olive oil and roast at 400°F until golden brown.
4. How long does fried squash stay fresh?
Fried squash stays fresh for up to 3 days if stored properly in an airtight container in the refrigerator.